Setup SSL on Nginx Ubuntu 22.04 LTS easily by following this step-by-step guide. For those who didn’t know, Nginx is an open-source, free HTTP server software. In addition to its HTTP server capabilities, Nginx can also function as a proxy server. I will show you the step-by-step setup of SSL with Nginx on Ubuntu 22.04 (Jammy Jellyfish).
1. Prerequisites
- The operating system running Ubuntu Linux
- A root or non-root user with Sudo privileges
- Has stable internet connection
- Terminal window / Command line
2. Install Nginx On Ubuntu 22.04
If you have installed nginx, you can skip this. If you have not installed Nginx, then you click on this link: How to Install Nginx on Ubuntu 22.04 LTS
3. Create Nginx Virtualhost
First, create an Nginx virtual host to serve the HTTP version of the website.
sudo nano /etc/nginx/sites-available/<Your Domain Name>.confThen, Use the below configuration for your website. Remember to change server_name, root, and fastcgi_pass based on your requirement.
server {

  listen 80;
  server_name sslforweb.ga www.sslforweb.ga;
  root /var/www/html/sslforweb.ga;

  location / {
     index index.html index.htm index.php;
  }

  access_log /var/log/nginx/sslforweb.ga/logs/access.log;
  error_log /var/log/nginx/sslforweb.ga/logs/error.log;

  # Remove this section if the site hosts only plain HTML files
  location ~ \.php$ {
     include fastcgi_params;
     fastcgi_intercept_errors on;
     fastcgi_pass unix:/run/php/php8.1-fpm.sock;
     fastcgi_param SCRIPT_FILENAME $document_root$fastcgi_script_name;
   }
}Once you have created the virtual host configuration file, enable the website.
sudo ln -s /etc/nginx/sites-available/sslforweb.ga.conf /etc/nginx/sites-enable/sslforweb.ga.confNext, Create a root directory to hold your website’s files.
sudo mkdir -p /var/www/html/sslforweb.ga/Then, Change the ownership and group of the directory.
sudo chown -R www-data:www-data /var/www/html/sslforweb.ga/If you Finally, place the test HTML file on the website’s document root.
echo "This is a test site @ sslforweb.ga" | sudo tee /var/www/html/sslforweb.ga/index.htmlThen, restart the Nginx service to re-read the configurations.
sudo systemctl restart nginx4. Allowing HTTPS Through the Firewall
If the UFW firewall is enabled, as recommended by the prerequisite guides, you’ll need to adjust the settings to allow HTTPS traffic. Upon installation, Nginx registers a few different UFW application profiles. You can leverage the 443 port to allow HTTP and HTTPS traffic on your server.
To verify what kind of traffic is currently allowed on your server, check the status:
sudo ufw status
To allow for HTTPS traffic, allow the 443 port:
sudo ufw allow 443
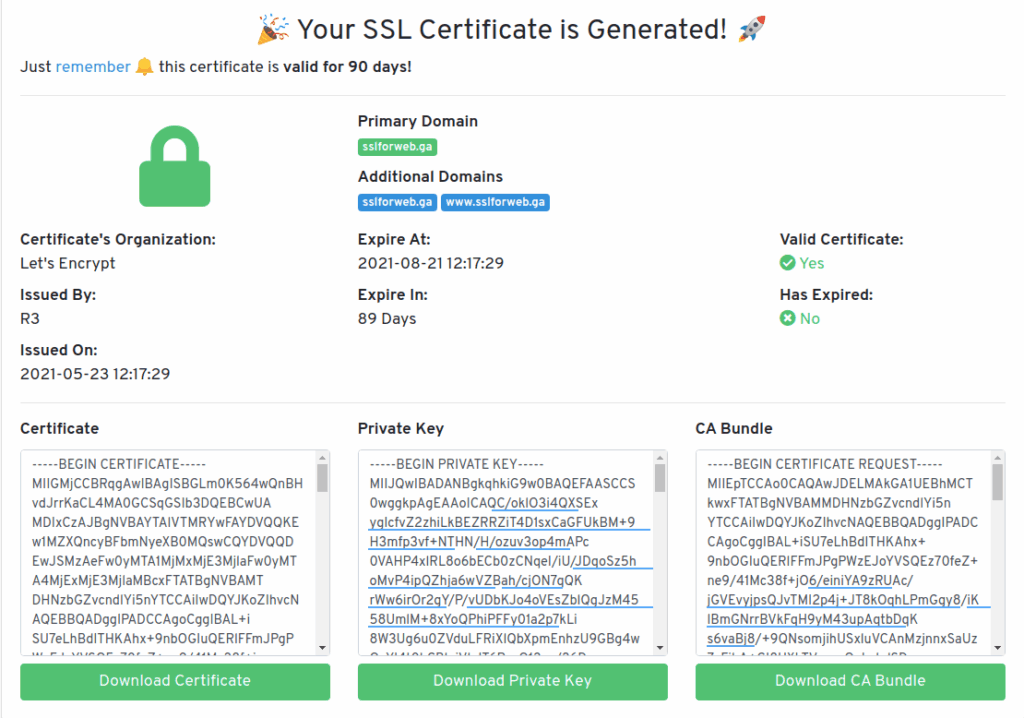
5. Online Generate Free SSL From SslForWeb
If you don’t have SSL Certificates, you can generate SSL for free through SslForWeb. Please refer this article: Generate Free Let’s Encrypt SSL Certificate.
6. Setup SSL On Nginx
This article will use a separate Nginx virtual host file instead of the default configuration file. We assume you already have a working nginx virtual host for your domain. We can run the command below to copy the sslforweb.com.conf configuration file to yourdomain.com-ssl.conf. Please change sslforweb.ga to your own .conf file in the command to ensure it runs properly.
sudo cp -a /etc/nginx/sites-available/sslforweb.ga{.conf,-ssl.conf}Now we are going to store the certificate on the server.

First of all, Copy Certicate then run the below command:
sudo nano /etc/ssl/certs/sslforweb.ga.crtThen paste it certicate and save the file. After, Copy Private Key then run the below command:
sudo nano /etc/ssl/private/sslforweb.ga.keyThen paste it private key and save the file.
Let’s edit the new virtual host ssl file.
sudo nano /etc/nginx/sites-available/sslforweb.ga-ssl.confReplace
listen 80;In the first line with
listen 443;Then, add these three lines:
ssl_certificate /etc/ssl/certs/sslforweb.ga.crt;
ssl_certificate_key /etc/ssl/private/sslforweb.ga.key;Save the file then exit.
After this, we need to enable the SSL version of your site. We can run this command to enable the site:
sudo ln -s /etc/nginx/sites-available/sslforweb.ga-ssl.conf /etc/nginx/sites-enable/sslforweb.ga-ssl.confAt last, check your nginx configuration by running this command:
sudo nginx -tIf everything is okay, then you will see the “Syntax OK” message, and you can restart Nginx.
sudo systemctl restart nginxCongratulations! At this point, you should be able to enable HTTPS protocol with Nginx on Ubuntu 22.04.
Thank you for reading this article!


